I’ve implemented most of my planned pipeline, finally. Just want to do a brief walkthrough to brag about features to show what this set of tools is capable of doing.
The pipeline uses symlinks to allow each asset or shot to exist inside its own self-contained Maya project workspace, while linking together key directories in those workspaces to all point towards the same repository. This way, textures can all be found in a single location, cache data can be shared between departments (Animation, Lighting, etc), and renders can all be easily found in a single place, without confusing Maya by rendering to paths outside of the workspace.
All project-level commands can either be run from a Linux terminal or from the web interface mentioned in the previous post. New project structures are generated using a master XML file that defines folder names/hierarchies and permissions bits for each folder, to prevent regular users from writing files where they shouldn’t.
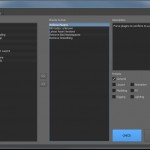
The File Manager handles assets and shots. Assets can be “tagged” in order to categorize them in the menu on the left. These tags are arbitrary, can be changed at any time, and don’t affect the file structure at all, so the way assets are organized can evolve fluidly without screwing up references. Asset versions are organized using a public/private system, so users do whatever they need to do inside their own work folders, then “publish” the asset, which automatically is assigned a name and version number based on the department it’s being published to (such as Modeling or Rigging). Artists using these assets can automatically receive updates to their references without dealing with a “master” asset constantly being overwritten and screwing up in-progress renders or simulations. Each version has notes associated with it, and for published versions an automatic note tracing the file back to the work file it was originally saved from.
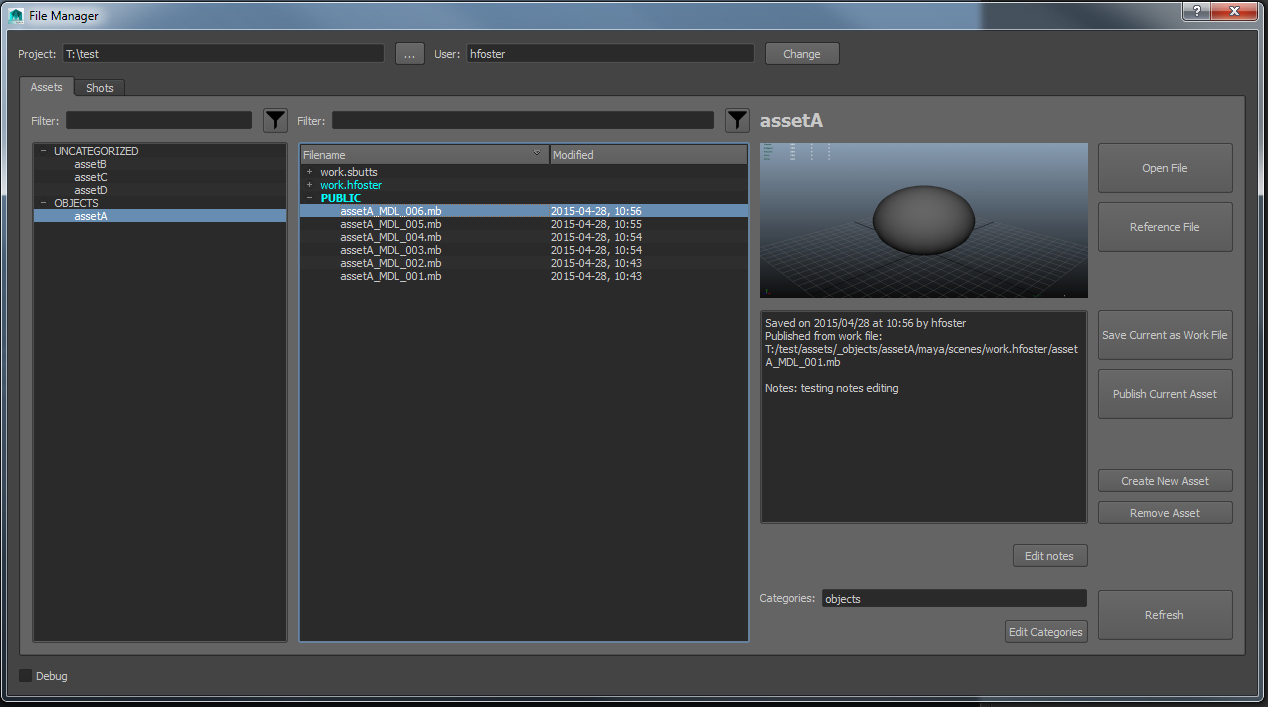
The Assets tab of the File Manager.
The Animation I/O tool handles the import/export of animation data, including cameras. Animation can be exported either as baked curve data (Maya ASCII), or as Alembic caches. The hybrid approach is to maintain a light server presence and flexibility, since blindly caching Alembic data for everything can seriously bog down a server, not to mention the time it takes to actually write an Alembic cache in Maya. Animation is written out to shared cache folders named after the shot they were exported from, and animation exported this way can be automatically updated using the import tools. Lighters don’t even have to know what assets are supposed to be in their scenes; the Match Exported Scene button will automatically pull in references as needed when importing data (even when the data is not Alembic). A single click will make sure that a lighter’s scene exactly matches the animator’s scene (minus all the junk that animators like to leave around).
-
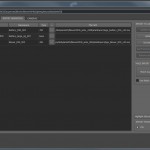
- Animation import tools. Data for existing assets can be updated with a single click. The Match Exported Scene tool will bring in missing assets.
-
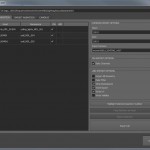
- Animation export tools. Any referenced asset can export baked curves, Alembic data, or both.
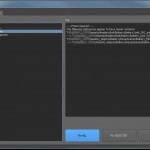
The Look manager tool handles shading and render layers. A user can shade, apply render layers, per-layer overrides, displacement sets, etc., and then save those customizations to a Look file. This Look can then be applied to an identical (or nearly-identical) asset anywhere else in the project. Materials are saved to a separate file that is then referenced into other scenes by the Look Manager. If you have multiple objects sharing the same Look, they will shared the shader reference, helping the Hypershade stay as clean as possible. Shading and layer assignments are handled by object name, so if your receiving asset is named slightly differently (Asset_A vs. Asset_B) you can use a find/replace string to substitute object names. Shading in this pipeline is completely independent of lighting and can be adjusted and modified (aside from UV adjustments) anywhere, then saved as a Look for use by others. When Looks are removed or replaced, the Look Manager automatically removes unused render layers and displacement sets, as well as referenced materials files that are no longer in use.
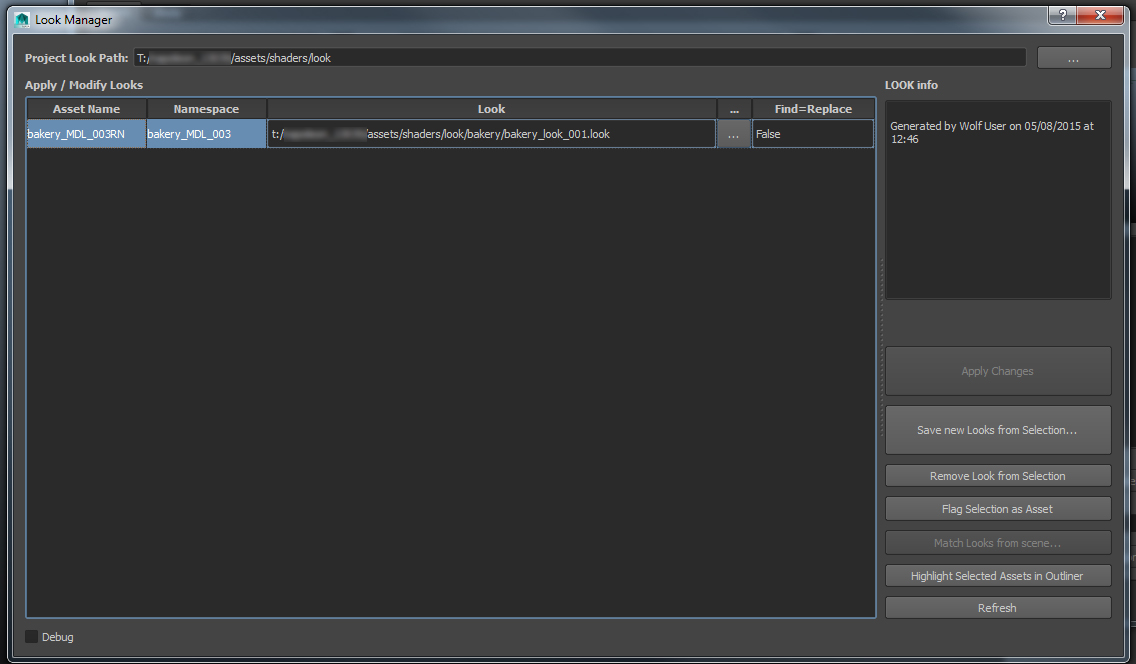
The Look Manager interface.
The Preflight system helps keep assets and scenes conforming to pipeline structure. A series of checks is run, with presets for checks available based on department (Modeling, Rigging, Lighting, etc). Each check will be highlighted if there is a problem, which can then be fixed with an automated function. Each check maintains its own viewable log, so users can see exactly what the problems are and what is fixed if the function is run. The checks are dynamically loaded from a folder, and each check is based on a template. A pipeline operator or power user could add their own checks to this folder as long as they fit the template, and they will be automatically loaded into Preflight at next launch.
-
- The list of Preflight checks to run. Each check comes with description text, and can be activated by a preset or manually.
-
- After Preflight checks are run, items in need of attention are highlighted in yellow. These items can automatically be repaired by pressing the blue button.
Renders, once finished, can be quickly loaded into an Auto-Comp generated in Nuke or NukeAssist. The ReadGroup script creates a special group that will take all single-channel passes in a folder and combine the channels together into a single stream. The entire group of Read nodes can be updated simultaneously by picking a new folder on the ReadGroup, rather than having to manually replace each individual channel. Another button on the ReadGroup automatically replaces each main sequence type (Beauty, Tech, and Deep pass groups) with the latest available version. Another click quickly generates a composite out of the channels within, adding or multiplying channels depending on the channel names (this function assumes a VRay pipeline but could be expanded to work with Arnold or mental ray) and creating a fast comp along with a contact sheet to check passes quickly. Lighters can use this tool to make sure their passes rendered correctly, and then use the “Approve Renders” button to automatically move footage from the “incoming” renders directory to the “approved” renders directory, where compositors can use them. Compositors can keep groups of renders linked together easily for version control, and use the auto-comp as a starting point for breaking out channels in their comps.
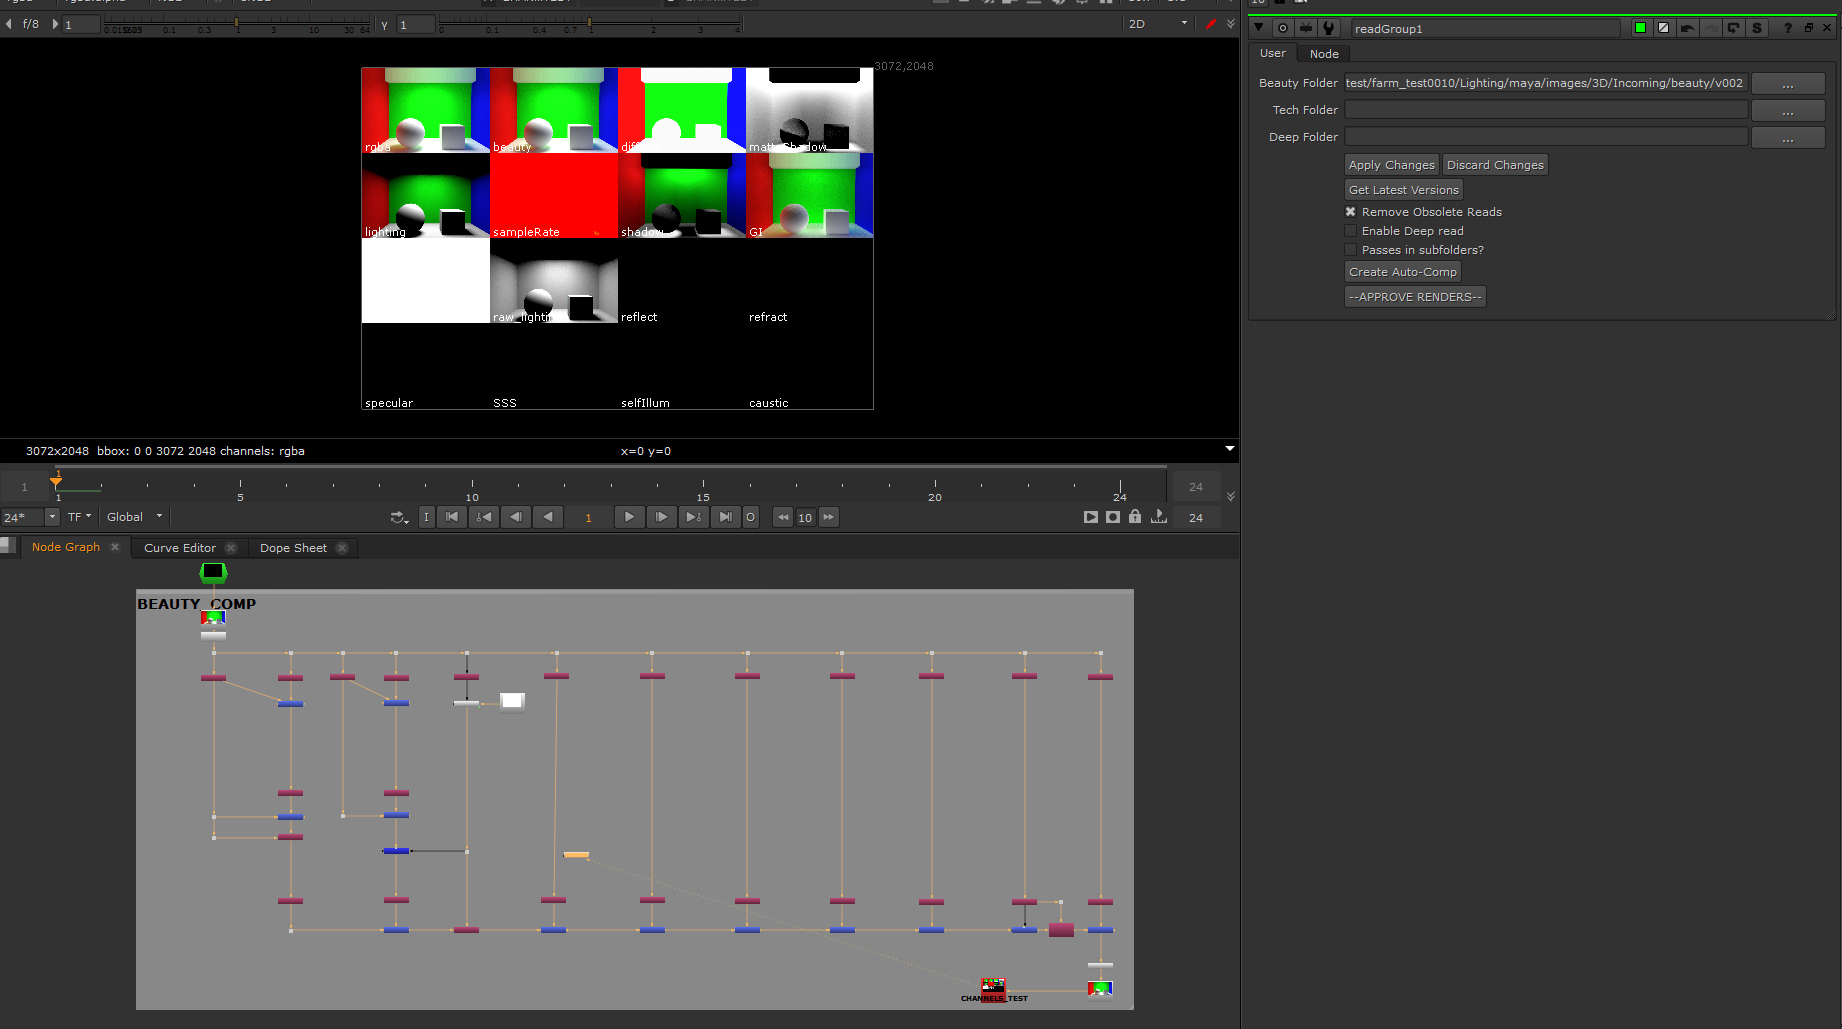
A generated Auto-Comp, with the interface panel on the right.
The pipeline is built to be as modular as possible, so each piece doesn’t necessarily need to know what the other pieces are doing in order to function. A few core scripts automatically set the user’s workspace when files are opened or saved, and a couple optionVars maintain the current user and project folder. Everything else can be derived from the workspace, so the tools can be used piecemeal in a pipeline (for the most part) if necessary. Most configuration is done in a single settings.py file, which can be edited to configure the pipeline for just about any server setup. The goal was to make a pipeline that could be entirely feature-complete if necessary, or to have the tools operate individually as a layer on top of an existing pipeline.
Sorry about the big long bragpost, just wanted to have a place to document what I’ve been spending all these months working on since it’s hard to put something like this in a demo reel!