I’m going to try to make a nice easy introduction to my two favorite functions in Houdini VEX (besides fit01 and chramp of course): xyzdist and primuv. These functions are at the core of a lot of really useful and cool tricks in Houdini, including rivets, the attributeInterpolate SOP, the old “droplets falling down a soda can” effect, and some really awesome stuff with volume shaders. I’ll do a little example of each as a way of showing off what you can do with these clever little tools.
First, let’s take a look at the VEX definition (the third overload here is the most frequently used):float xyzdist(string geometry, vector pt, int &prim, vector &uv, float maxdist)
At its most basic, xyzdist will return the distance from the sample point pt to the nearest point on the surface geometry. Note that this doesn’t mean the nearest actual point, but the interpolated surface in between those points.
Those little “&” symbols mean that this function will write to those parameters, rather than just read from them. So if we feed this function an integer and a vector, in addition to the distance to the surface, it will also give us the primitive number prim and the parametric UVs on that primitive uv. Note that parametric UVs are not the same as regular UVs… this just means the normalized position relative to the individual primitive we found.
So, what can we do with this? Click below to find out…
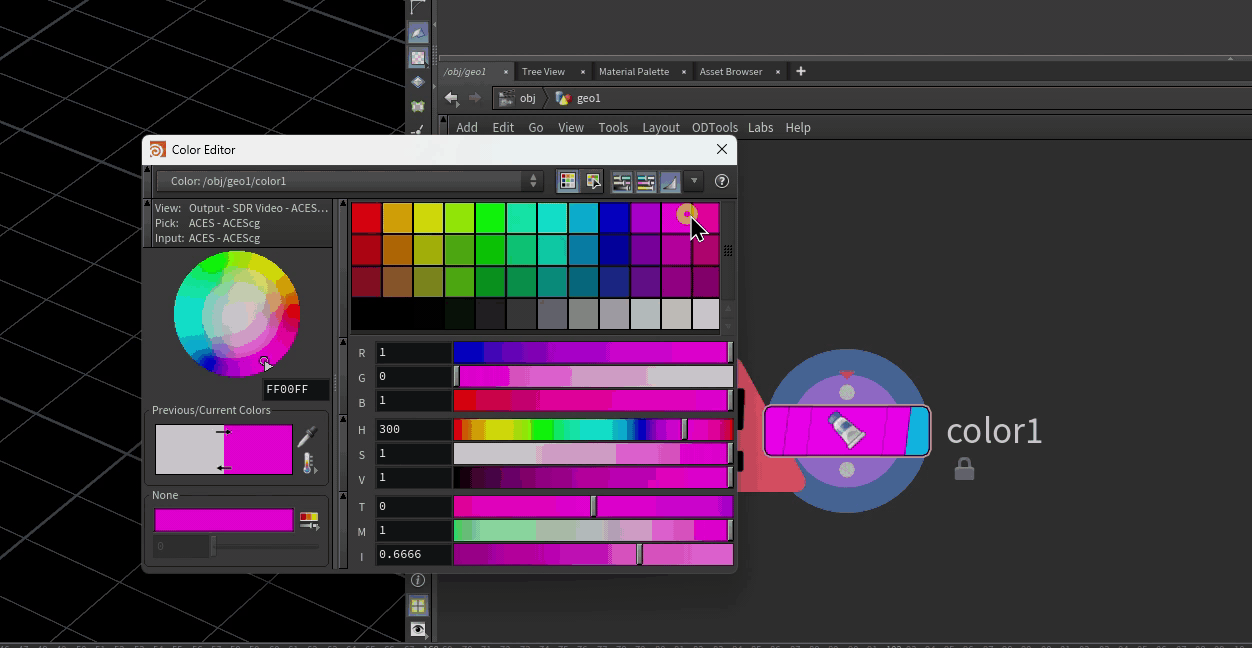
The easiest example to start with is the rivet. We just want to stick a point onto an object, and have it follow the object around. To do this, we’ll make our template geometry, and then add a point in space using an Add SOP, then use our magic xyzdist function to get the information we need for the nearest point on the template geometry.
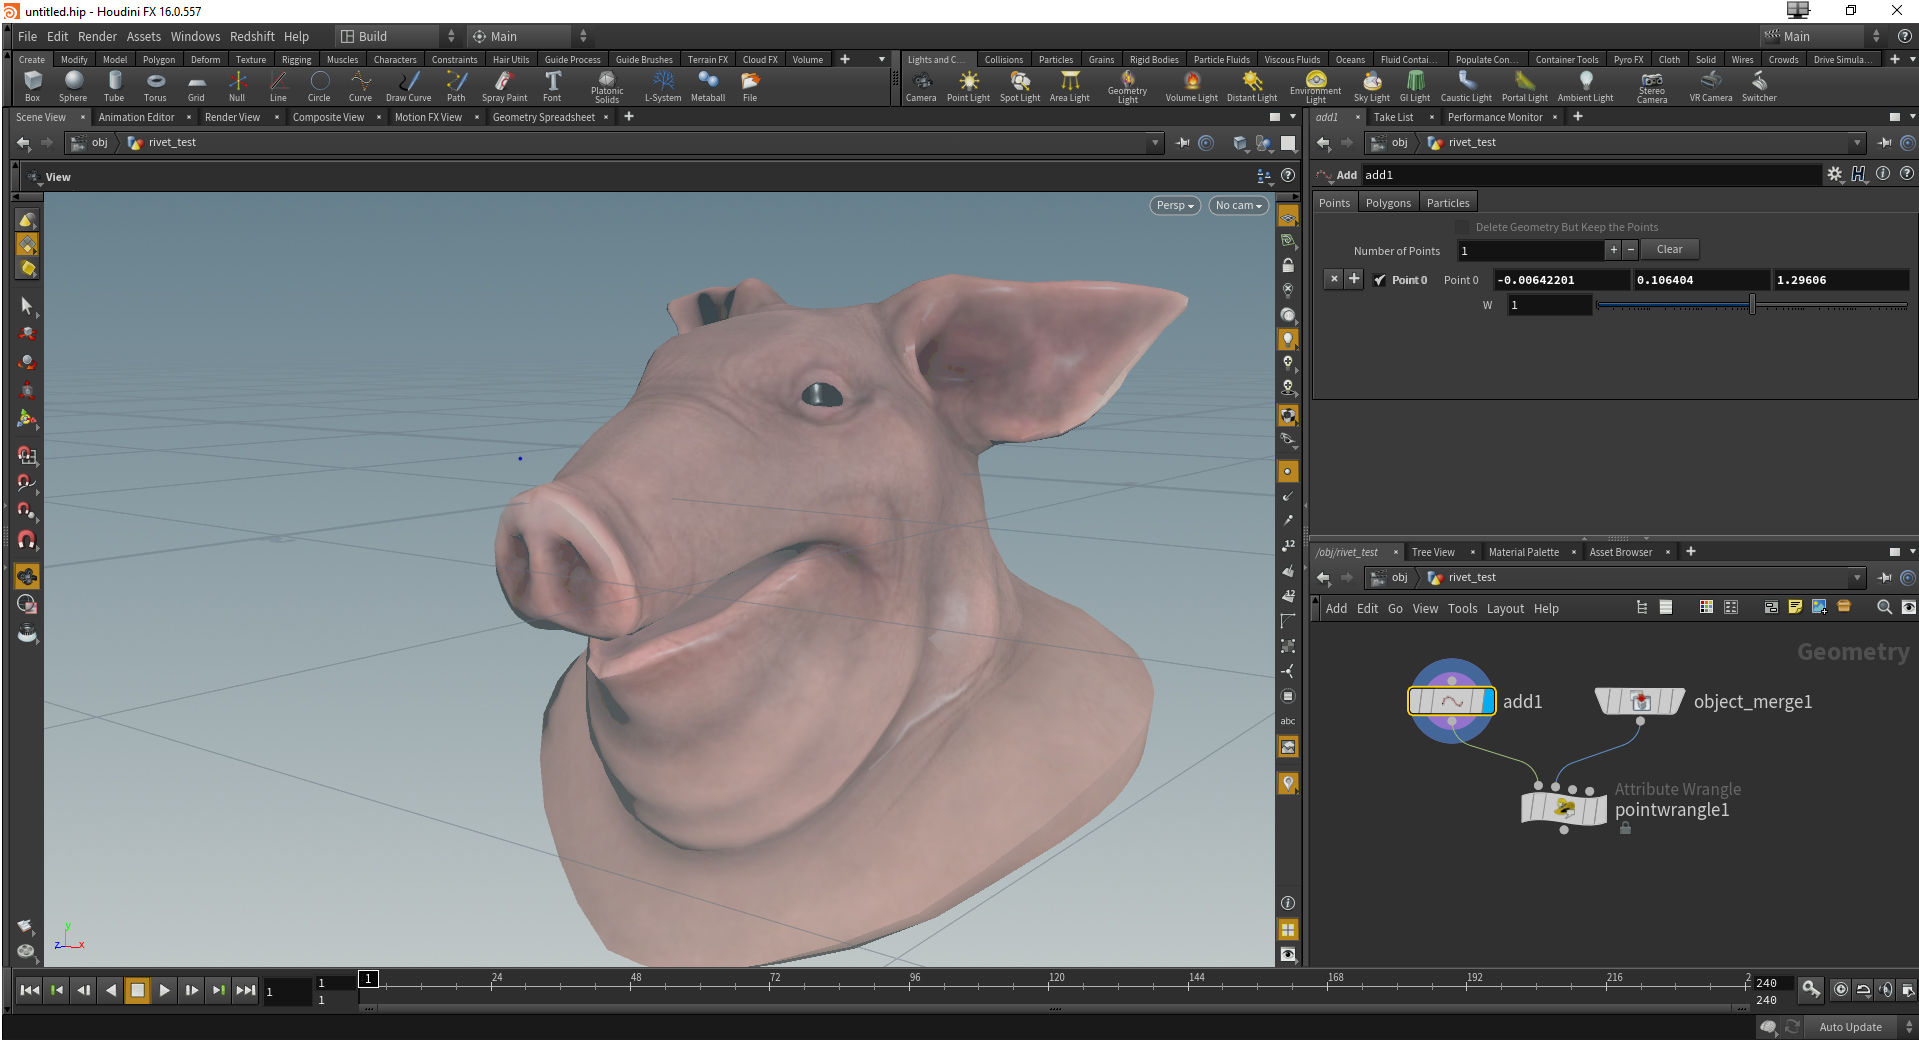
Next, let’s figure out the nearest primitive and parametric UV on that pig head. Connect your point and your template geometry to a Point Wrangle, and start with this code:
int posprim;
vector param_uv;
float maxdist = 10;
float dist = xyzdist(1,@P,posprim,param_uv,maxdist);
The first parameter, of course, is the input index we’re getting this information from. The pig head is plugged into the 2nd input, but arrays start at 0, so it’s input 1.
Now what? It’s time for xyzdist‘s best friend forever, primuv. Given a geometry, a primitive number, and a parametric UV coordinate, primuv will tell you whatever the hell you want to know about the geometry at that point. It will even interpolate attributes for you between points (such as point colors, or position). We want to get the position to stick to, so let’s use this function to grab “P”. Add this code to your Wrangle:
vector pos = primuv(1,"P",posprim,param_uv);
@P = pos;
You should see your dot stick to the nearest point on surface! If you transform the pig head, though, the rivet won’t stick to the right place, because it’s constantly recomputing the nearest primitive/parametric UV. You only want to do that computation once. With deforming geometry, you could use Time Shift to pick your reference frame. With just a pig head being transformed at object level, we can use some options on our Object Merge to accomplish something similar. We’ll also need to split up our Wrangle into two. Here’s the code for the original Wrangle now:
int posprim;
vector param_uv;
float maxdist = 10;
float dist = xyzdist(1,@P,posprim,param_uv,maxdist);
i@posprim = posprim;
v@param_uv = param_uv;
We’re just storing the primitive and parametric UVs to our point. On the Object Merge, we’ll set the Transform option to None, which means the transform will not be applied when we move the container later on. Then we’ll drop down a separate Object Merge (with Transform set to “Into This Object”) and a separate Wrangle, and connect them like so:
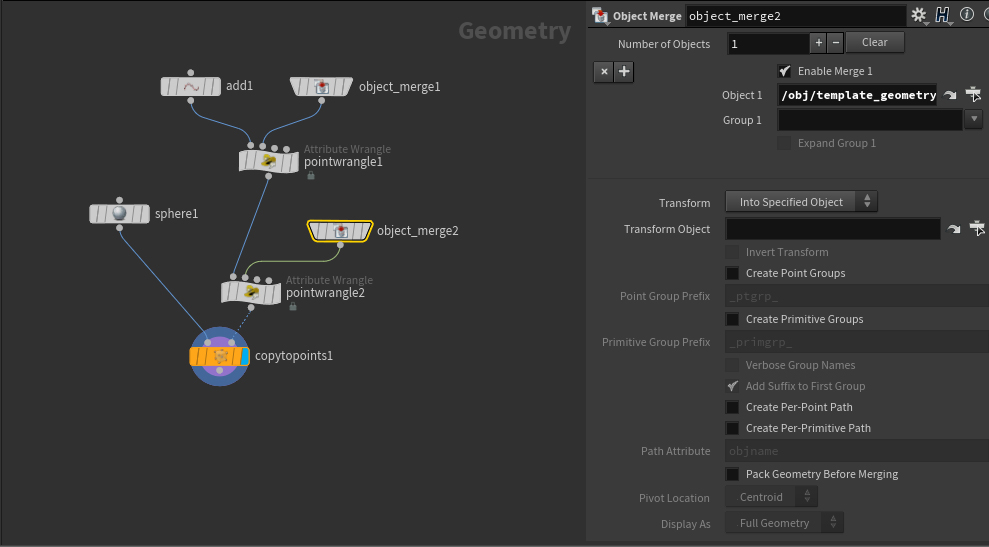
(The Copy To Points and sphere are just there to make the rivet more visible.)
Now we’ll just take the second part of our original Wrangle and modify it to use the attributes we stored. Your code should look like this:
vector pos = primuv(1,"P",i@posprim,v@param_uv);
@P = pos;
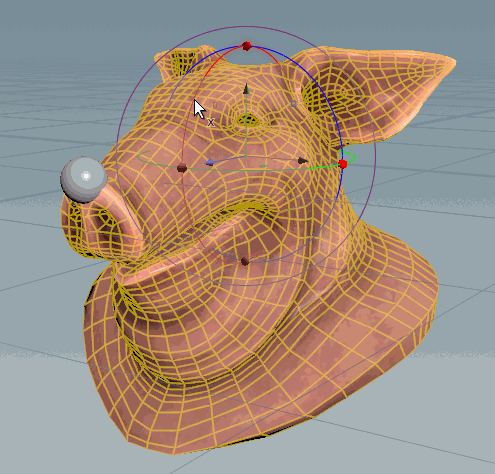
Now if we jump back into /obj/ and move the pig head around, the rivet will stick to the original point it was assigned to. We’re only computing that point once, then just getting the position at the parametric coordinates of that primitive and applying it to our point on each cook.
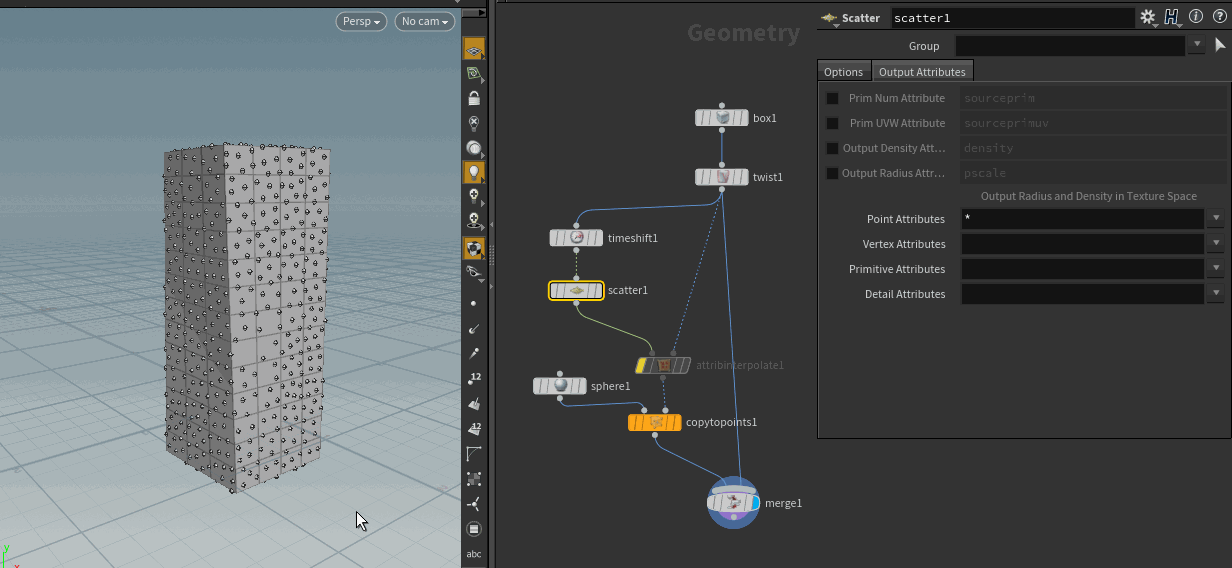
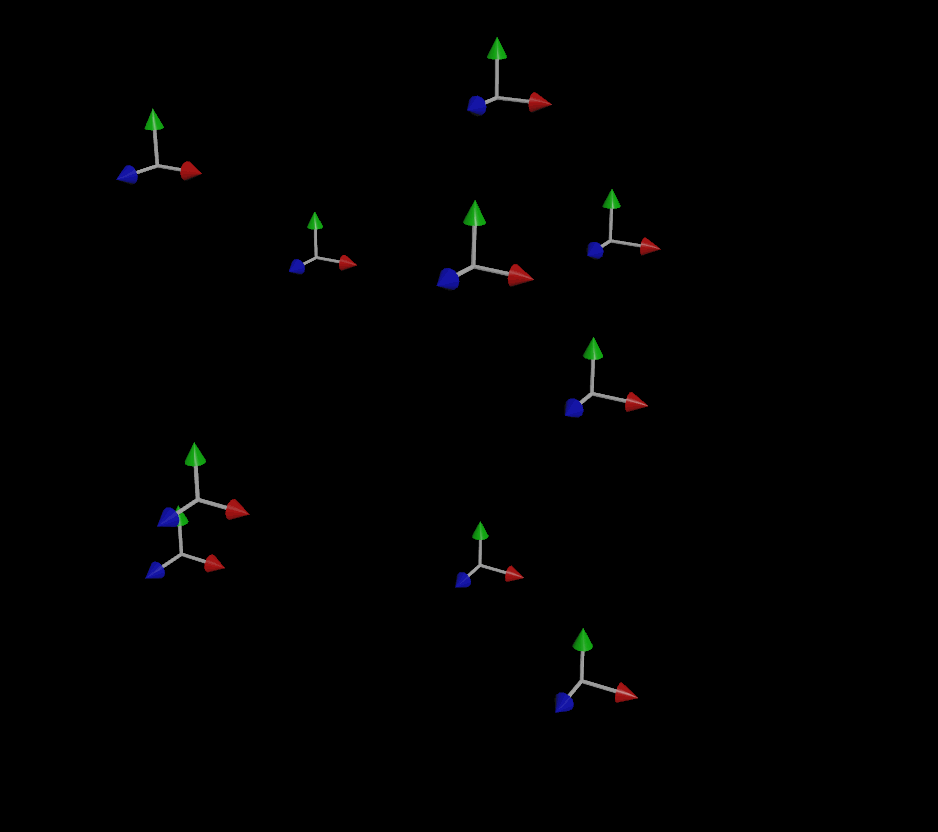
This is a very simplified version of what the Attribute Interpolate SOP is meant to do. The Scatter SOP, for example, can automatically generate a “Prim Num Attribute” and a “Prim UVW Attribute” that Attribute Interpolate knows to look for. If you run the Scatter on static geometry (in this case with a Time Shift), we can use Attribute Interpolate to stick those points onto the moving geometry, via the same two values we can get from xyzdist. Remember to make sure that the attributes on the Scatter (or any other node generating the points) and the Attribute Interpolate are the same name.
Now let’s try another classic FX example, the old “droplets on a soda can” effect. Here we are actually going to use some actual old-fashioned UVs, as well as our fancy new functions, to achieve the effect. (This can also be done using Sticky POP collision, but for this demonstration let’s just ignore that feature).
We want the droplets to move down the surface of the can, maybe wiggling back and forth a tiny bit the way that droplets do due to surface tension. We could solve this particle simulation on a cylinder, and use sticky attributes or ray projection to figure out ways to wiggle the particles around and still keep them attached to the surface. Or, we could just solve the problem in an easier space. UVs are nice and simple and flat! So let’s just solve this in UV space, and then wrench it back into the space we want afterwards.
We’ll start with a simple polygon Tube, and then make some UVs from a Cylindrical projection. We want to make sure these are Point UVs, so we can manipulate points with them later. Once we have a projection we like, we can move the points into UV space with the following Point Wrangle:
@P = v@uv;
Now you should see the points moved to their UV coordinates, but in real space. We can solve the particle system in this space very easily. I won’t go into the details here (the HIP file is for download at the bottom of this post) but basically particles are emitted across the surface, and grow slowly at different rates. After they reach a certain scale threshold, a percentage of particles will be chosen to slide down the surface via a POP Wind DOP. Particles will randomly stop on their way down, similar to how droplets sometimes hit a rivulet or another sticky part of the contact surface and slow down. They’ll also leave a trail of shrinking particles as they go. Finally, particles that make it to the bottom of the can are destroyed.
Here’s what the simulation looks like in UV space:
Once the simulation is done, it’s time to store the attributes needed for primuv. Append an Attribute Wrangle and connect the flattened geometry to the second input. Your code should look something like this:
int posprim;
vector param_uv;

float dist = xyzdist(1,@P,posprim,param_uv,10);
i@posprim = posprim;
v@param_uv = param_uv;
Now that we’ve stored the attributes, all we need to do is apply them with the original geometry in world space. Another Wrangle:
vector pos = primuv(1,"P",i@posprim,v@param_uv);
@P = pos;

Now our simulation is interpolated back into world space! Keep in mind, P isn’t the only thing we could sample. We could get any attribute from the source geometry, such as N, Cd, orient… and we aren’t stuck applying this technique in SOPs context. We can use this in SHOPs/MATs just the same, with only some slight changes.
This effect is based on a much older trick to fake wispy volumes. Back in the day, if you needed wispy smoke like from a cigarette and you didn’t have the processors necessary to simulate a very high-resolution volume, you’d run some flat sheets of geometry through some procedural noise or a quick soft-body simulation, and then apply an X-ray (fresnel) shader to the geometry to approximate the effect of the thin tendrils of smoke overlapping each other to create opacity. We’ll update this old technique by writing a volume shader that can read both the distance from a geometric surface, and attributes such as Cd and Alpha, in order to get a look that’s fast to develop and requires little to no simulation.
First, a simple procedural geometry setup. I’m making a flat, dense ribbon, copying it a few times in a circle, making sure the UVs are unique per-copy, and then running some UV-driven noise through it to displace the curves. I’m also using some noise to generate Cd, and a simple ramp for Alpha. The result in SOPs looks like this:
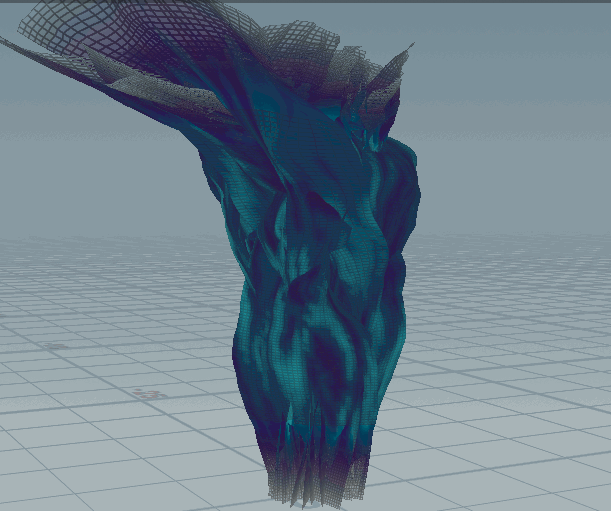
Now we can convert this to a volume. I just scattered points on the ribbons and used Attribute Interpolate to keep them from jittering, then used VDB From Particles to generate a fog volume. The volume’s resolution doesn’t need to be high at all, since we’re going to use the ribbon geometry as a sort of guide for our shader. Now for the shader network. In order to use xyzdist and primuv in shading context, we need to have the geometry cached to disk. Just write it out with a ROP Output Driver. Next, we build a material network. I’m still used to doing things in SHOPs, so inside the MAT Network I dropped down a Material Builder and then jumped inside to build the actual shader. Here’s what the network looks like:
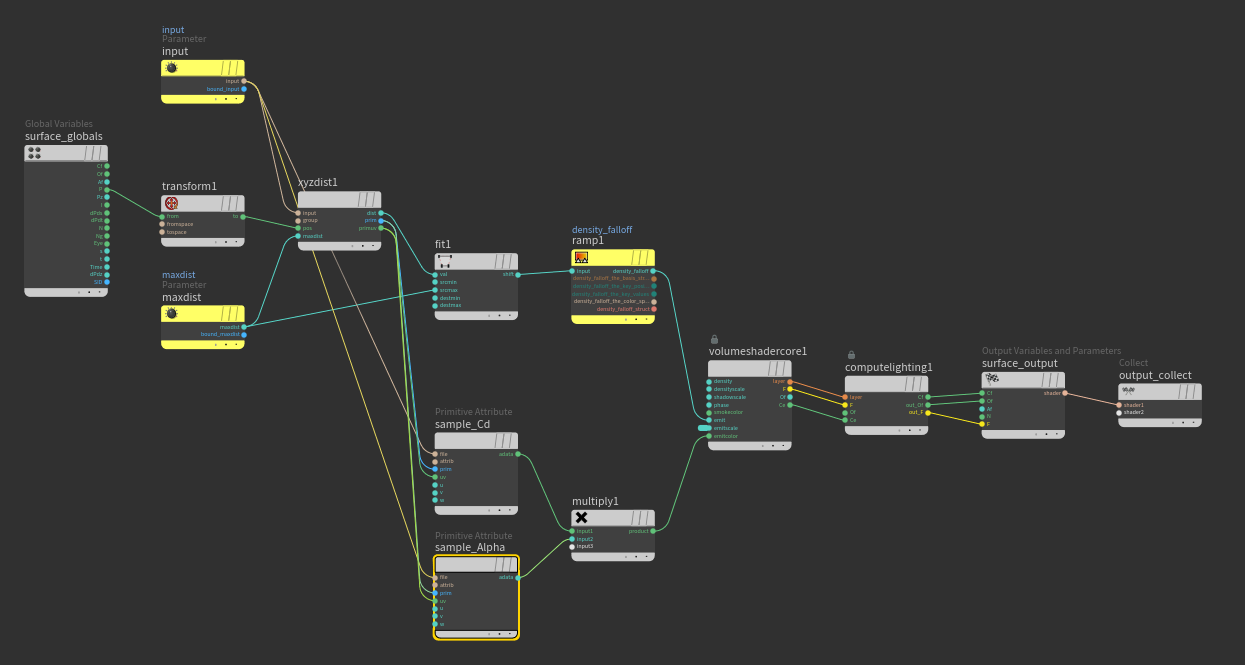
Really nothing we haven’t seen before. The Transform VOP at the beginning is to make sure that we’re reading things in world space. The XYZDist VOP takes an “Input” parameter, which is a string pointing to the geometry file we just cached. We take the “dist” result from that VOP, which represents the distance from the currently sampled point in the volume to the surface, and map that to a Ramp parameter using a Fit Range VOP. The “maxdist” parameter determines both our search radius, and the maximum source value for the ramp. This will essentially determine how sharp or blurry our volume renders, in addition to the ramp for more precise falloff control. The end result of this determines our emission (Ce) amount, handled by the Volume Shader Core.
To get the color and alpha from the source geometry, we use a pair of Primitive Attribute VOPs, which are the VOP equivalent of primuv. You provide a geometry file, which we already have a parameter for, and a primitive number and parametric UV, same as we did before. Just tell it what attribute to sample (and make sure the signature is correct!) and you have the attribute value at the nearest point on the geometry. Multiplying the color value by the alpha gives us the final emission color, which pipes right into the Volume Shader Core. I set the Density Scale to 0.0 and promoted a parameter for Emission Scale, since I wanted this to be a purely emissive “plasma” kind of effect, but you could map these values to whatever parameter you like.
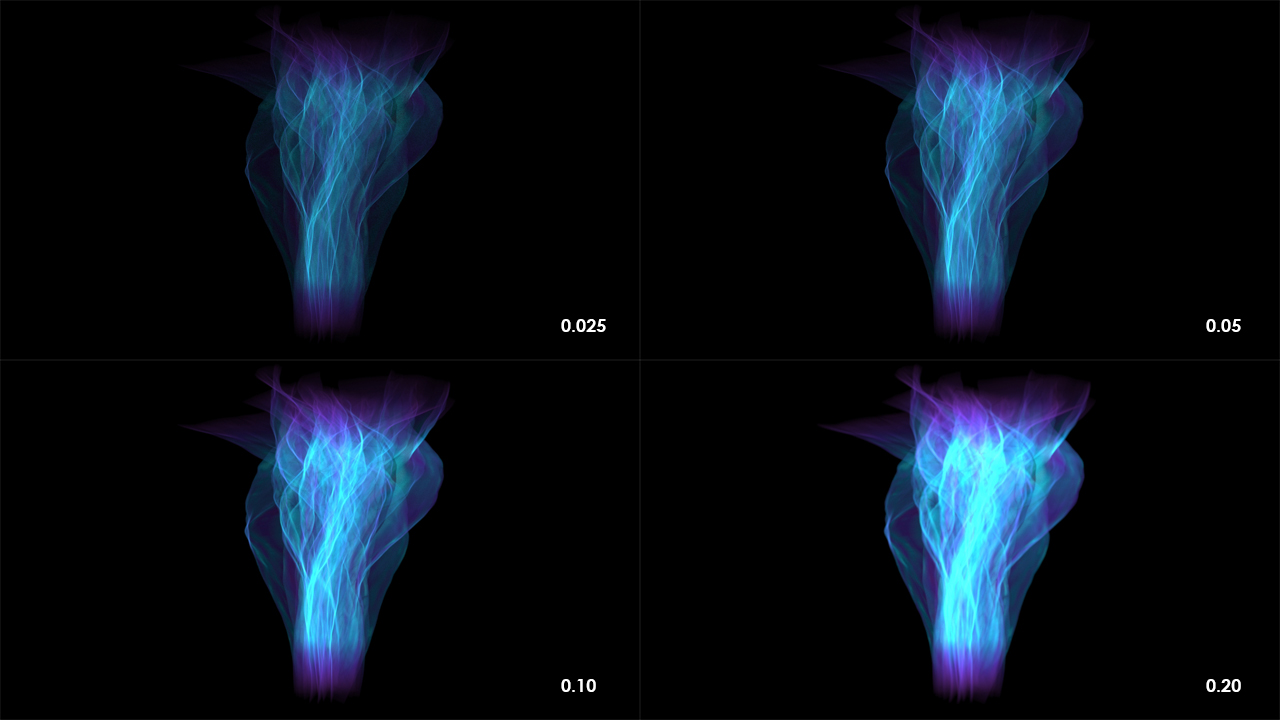
Now just make sure your render flag is set to the generated volume, and apply the material. If your render is a little blurry, all you have to do is adjust the Max Distance parameter and maybe tweak the ramp, and you can start to get some really nice wispy-looking sharp edges that would otherwise take a very, very long time to achieve with pure volumes. Note that if your VBD resolution is particularly low, you might have to increase Volume Quality on your ROP to compensate. Here’s some examples with a few different Max Distance settings:
I hope this was a useful introduction to these two incredibly handy VEX functions! Let me know if you come up with any other interesting ways to use them, or improvements on the methods used here. As always, here’s your HIP files:
5 Comments
Noc2 · 03/23/2018 at 18:34
Hi;
Thank you for all these wonderful tuts, truly appreciated :) I’m wondering, how would you get the descending lead or even the trailing particles to grab and transform the ones they run into on their way down? Thank you :)
toadstorm · 03/23/2018 at 18:57
I think you’re asking if there’s a way that droplet trails can “consume” other particles on their way down? What you’d probably have to do is use a POP Wrangle, or maybe a SOP Solver, to split moving droplets from still ones. When moving droplets come too close to still ones, destroy the still ones or shrink their scale significantly, and maybe add a little bit to the scale of the moving one. You’d have to experiment a little bit to get the right look.
Noc2 · 03/25/2018 at 10:17
Thank you so much for taking the time to write back :) I’ll try that asap. I think a pop wrangle like you said is the way to go. Cheers :)
The rainy forest cinemagraph, Part 2 – Toadstorm Nerdblog · 04/28/2018 at 15:19
[…] primitives). If you’re not sure about parametric UVs or any of that magic, take a look at this post about the magic functions xyzdist() and primuv(). After defining all of these attributes, the […]
流体模拟的十个技巧-翻译文章 – 参天-分享影视后期经验 · 12/12/2021 at 21:56
[…] 我非常推荐看一下这个博客,就会对xyzdist和primuv有更好的理解:https://www.toadstorm.com/blog/?p=465 […]
Comments are closed.