Side FX added a new Cloud FX toolkit a version or two ago, and I recently had a chance to mess around with it. Their Cloud Rig shelf tool is pretty great out of the box… pick a shape, turn it into a cloud, done. The Cloud Noise and Cloud Light SOPs that are built into the rig setup can get some pretty good results, but it’s not exactly what I wanted… I was looking for a solution that would be a little less dependent on the volume container resolution, and more based on textures instead. It’s not necessarily the greatest solution for swirling, dynamic simulations, but for more-or-less static clouds, it gets resolution-independent nice results that are quick to generate. Maya’s fluid shader supports textures by default, but the Cloud Shader that Houdini uses doesn’t have much in the way of textural control, so I had to make some customizations, and that’s what this post is about. Check the link below to keep reading…
So there are three things that I want to add to the cloud setup in order to make it more flexible for me: I want the ability to multiply noise against the density of the cloud to break up the shapes a little, I want to be able to preview the effect of this noise in the viewport, and I want to be able to add displacement using procedurally-generated noise that can be advected so that it’s not just pushing voxels around in straight lines. This all sounds more complex than it really is. First, the easiest part: getting some noise in the shader. Jump into SHOPs and take a look… there’s not much to see. Cloud Color, Cloud Light, density, a scattering function, that’s about it. Time to make some noise. Dive into the Cloud shader and take a look at the network. A bunch of parameters are multiplied together and then fed into the Volume shading model. We’re just going to multiply some noise against the Density Scale parameter to make this work.
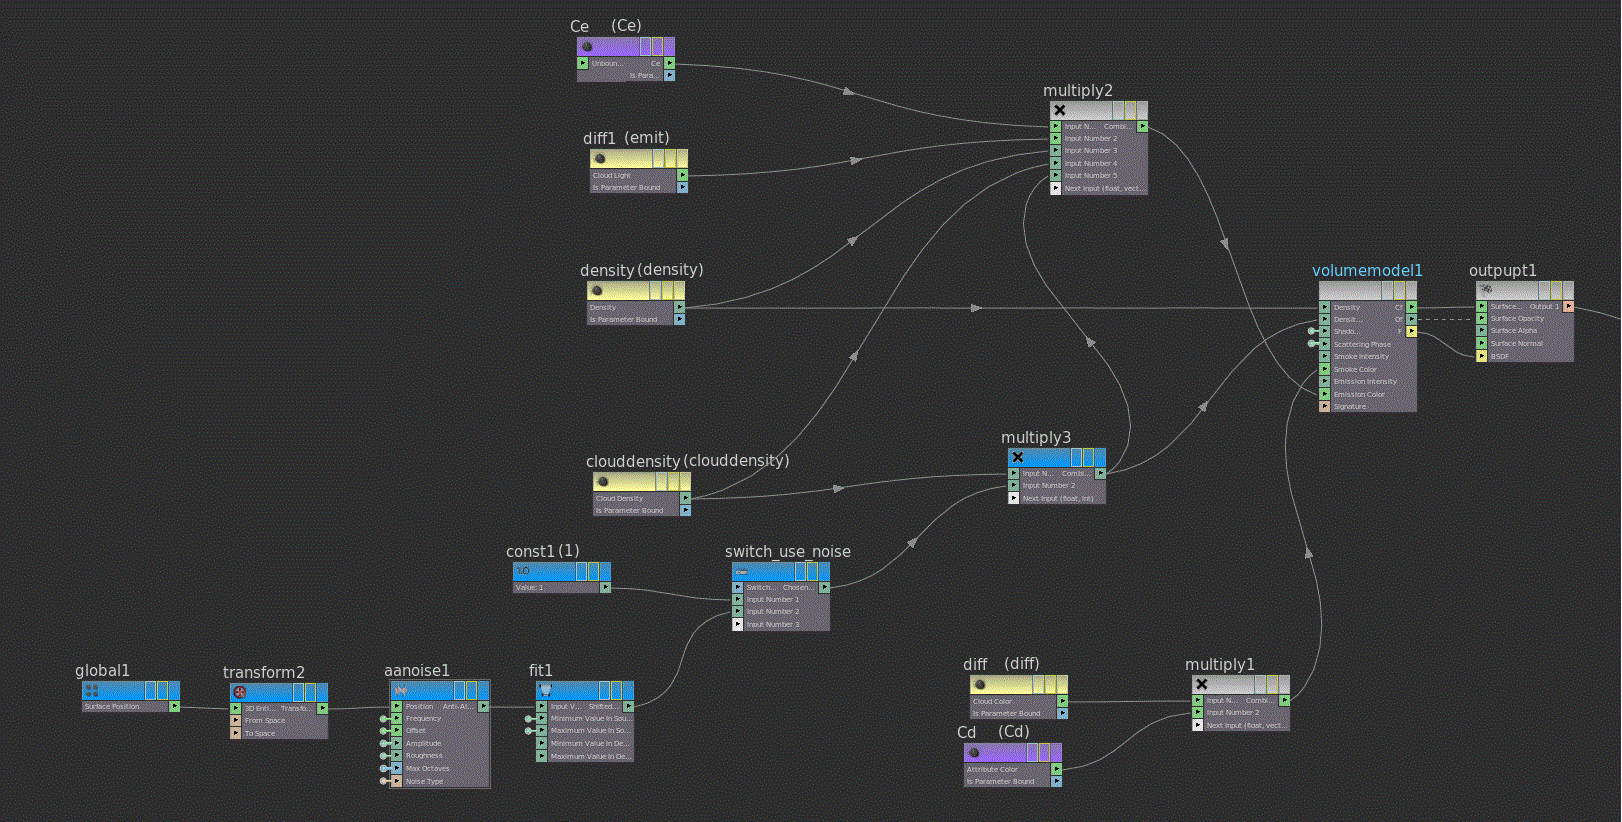
Fig. 1.) The cloud shader, multiplying a noise pattern against the Density Scale. New nodes are highlighted in blue.
Drop down an Anti-Aliased Noise VOP. We want the sampled position to drive the position of the noise, but we want to make sure the noise is being sampled in the object’s local space, so drop down a Global Variables VOP and connect the position to a Transform VOP, which should transform the space to object space by default. Then connect the output of the Transform VOP to the Noise VOP’s position. Next, connect the output of this noise to a Fit Range VOP to normalize it. The Source Min and Max should be -0.5 and 0.5 respectively if you’re using Perlin noise, which generates values in approximately that range. You can always fine-tune those numbers later. Next we can add a Multiply VOP and connect our noise to Input 2. Connect the “Cloud Density” parameter to Input 1. The output of this node connects directly to the Density Scale input of the Volume Model. This is mostly done, except that the emission values aren’t multiplied against this noise, which means that even if the density is cancelled out by the noise, it will still glow in those places. To fix that, connect the Multiply VOP’s output to the other Multiply VOP that was already present; the one that outputs to the Emission Color input of the Volume Model.
Your network should look a little like Figure 1 here. I also added a Switch VOP in order to offer a toggle to switch the noise off and on… the first input (“off”) just sets the noise to a constant value of 1, which will have no effect on the density when multiplied. Try cranking the amplitude of the noise and rendering your volume… you should see some noise breaking up the density of the cloud. If you don’t see anything, try adjusting the frequency, since this is strongly based on your scene scale. If you added a Switch VOP, make sure it’s on!
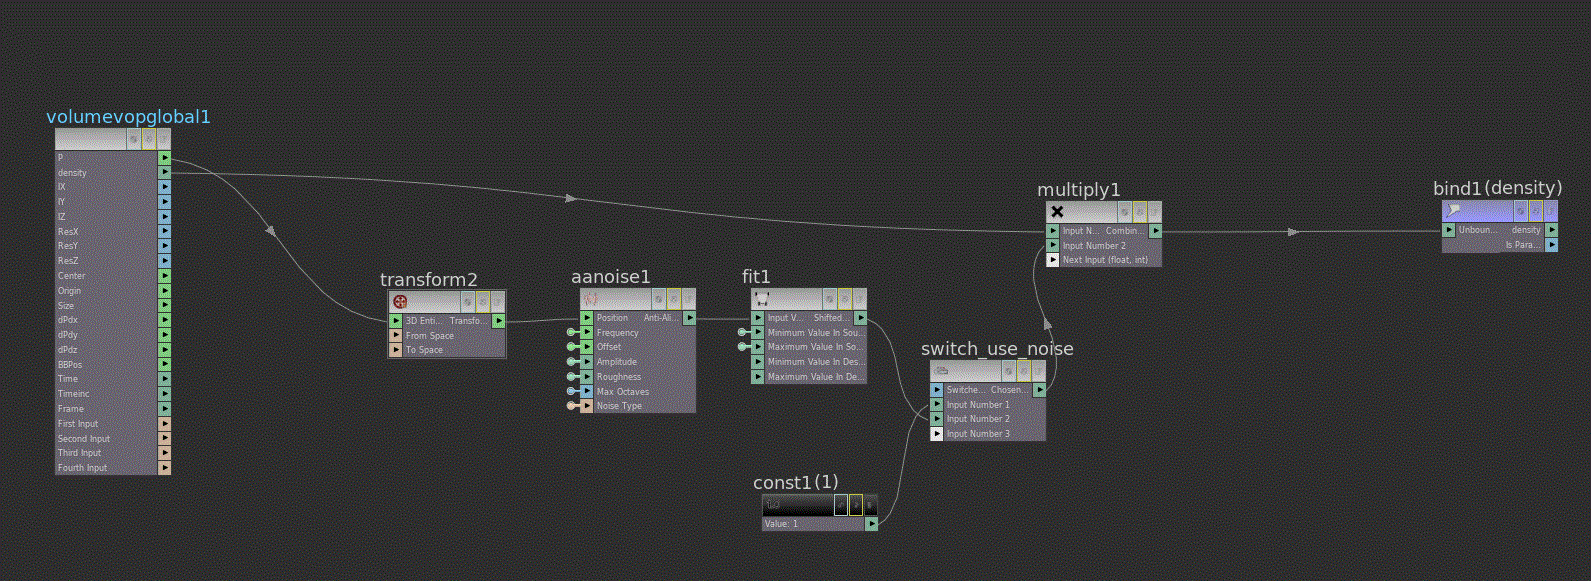
Fig. 2). The CVEX Shader network for previewing the texture noise. This can be referenced in SOPs using a Volume VOP pointing to this shader (Use Shop).
Okay, next up: we want to be able to preview this noise so that it’s easy to adjust the texture without having to render it every single time. You can run the same exact noise pattern through a Volume VOP and multiply it against the density of the volume, then use that Volume VOP as the display node for your cloud (NOT the render node!). The annoying part here is that you’re going to have to reference all your noise parameters in the Volume VOP so that they’re connected to the original noise parameters… no clean way around this. You could also create a CVEX shader inside your SHOP network that references the parameters directly from your shader, and then point the Volume VOP to use a Shop as the VEX Source, then point it to the path of the CVEX shader. The CVEX network looks exactly the same as the nodes you added to the Cloud shader… look at Figure 2. As you adjust the Noise parameters in your original Cloud shader, the Volume VOP should adjust the display of your cloud volume to match. If you’re not seeing much detail in the viewport you can increase the resolution of your volume, but the nice part about this approach is that the final render is going to be able to have much more detail than the resolution of your volume would otherwise permit. This way you can leave your container at a nice, manageable resolution, and still get very fine noise details in the render.
The last part is adding the displacement. The approach is pretty similar to the first part: generate some noise in object space. However, instead of multiplying it against the density, we’re going to add the noise value to the sampled position, and then apply that value as displacement. We’re also going to do it in a loop, so that for a certain number of iterations we keep sampling the same voxels and pushing them through a noise field over and over again. This will help us get noise that curls around instead of just going in straight lines, for a better wispy look.
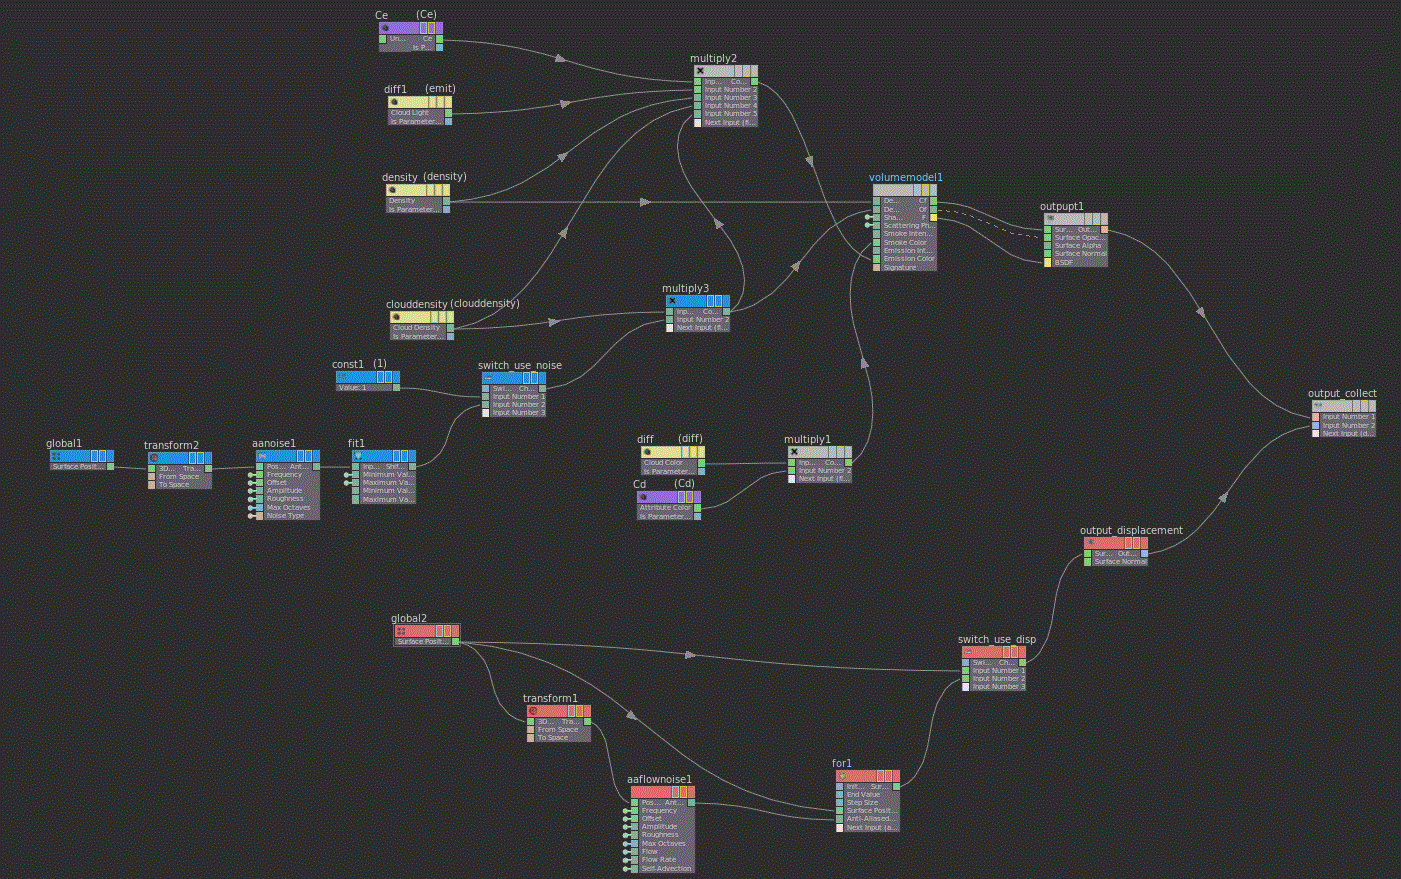
Fig. 3.) The cloud shader with displacement. New nodes are highlighted in red. Make sure the displacement output is set to be created last!
Inside your Cloud shader, drop down another Global Variables VOP, this time setting the Context Type to Displacement. Pipe this into a Transform VOP, then output to Anti-Aliased Noise, the same as before. Next, drop down a For Loop VOP. Connect the original Position output of the Globals VOP and the output of the AA Noise VOP to the additional inputs of the For Loop, then jump inside the Loop. Here we’re just going to add together the Surface Position and Anti-Aliased Noise outputs together, then connect the output of the Add VOP back to the Surface Position suboutput. Jump back out and create an Output Variables VOP, and set it to the Displacement context. Also, check on “Generate Code for This Node Last.” We want all this displacement stuff to take place after we do our original density multiplication. Finally, create a Collect VOP and connect the original shader output to the first slot, and the displacement output to the second slot. That should do it! You can add a switch here, too, if you want a quick toggle to disable displacement… just connect the original point position from the Globals VOP to the first input, and the output of your For Loop VOP to the second input. Check out Figure 3 for an image of the network. You can modify the Integer End Value of the For Loop VOP to set the number of iterations through the noise that you want to take. Higher numbers means curlier displacement (depending on the noise pattern you use).
That’s about it. I’d recommend wrapping the Cloud shader (and the accompanying CVEX shader, if you made one) into a subnet with all of the shader parameters built into it once you have everything working… this way it’s more reusable for other projects later. Here’s some examples of this method used on the old Stanford Bunny model:
-
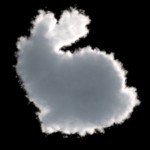
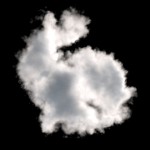
- The bunny with no extra noise or displacement applied. Volume uniform sampling is at 300.
-
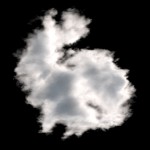
- The same volume multiplied against a noise pattern.
-
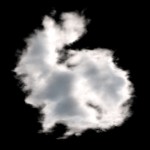
- The same volume, this time with noise being used both for a density multiplier and for displacement.
-
- The volume with the same noise and displacement applied, but at a third of the resolution of the original (uniform sampling=100). We lose some of the detail created by the Cloud Noise SOP, but the textural detail doesn’t change much.
You could easily add multiple layers of noise, or different kinds of noise, to modify both the density and the displacement for different kinds of wispy effects. Hope this was useful!
2 Comments
santosh · 02/22/2015 at 21:07
if i am transforming the cloud how would i go abt implementing a rest space?
toadstorm · 02/22/2015 at 21:26
If you define a rest attribute, you should be able to substitute “rest” for “P” or position in the CVEX shader and/or Cloud shader.
Comments are closed.