I meant to write a post about this a long while ago, but couldn’t be arsed to do it, apparently. Sorry!
Something that artists take for granted in render engines like VRay and Arnold is the ability to reflect and refract AOVs / render elements / render passes, depending on the engine’s terminology. Mantra however, characteristically enough, isn’t going to bother helping you with any such frivolity. You’ll have to write it into the shader yourself.
For this example, we’ll have a very simple (hideous) test scene:
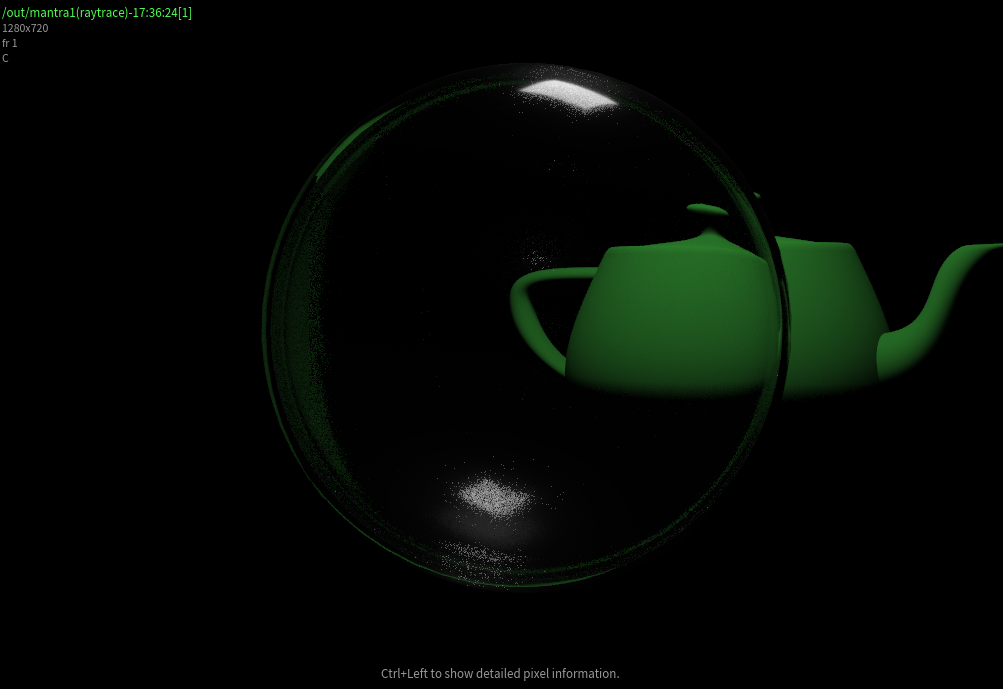
It’s beautiful!
The first thing you’ll need to do is to make sure that the object whose matte channel you want to refract is exporting some kind of value in the shader. This can be as simple as adding a Bind Export VOP in your shader and setting it to export a vector attribute named something like matte, then setting its color to red, green or blue. Inside a Material Builder, it’d look like this:
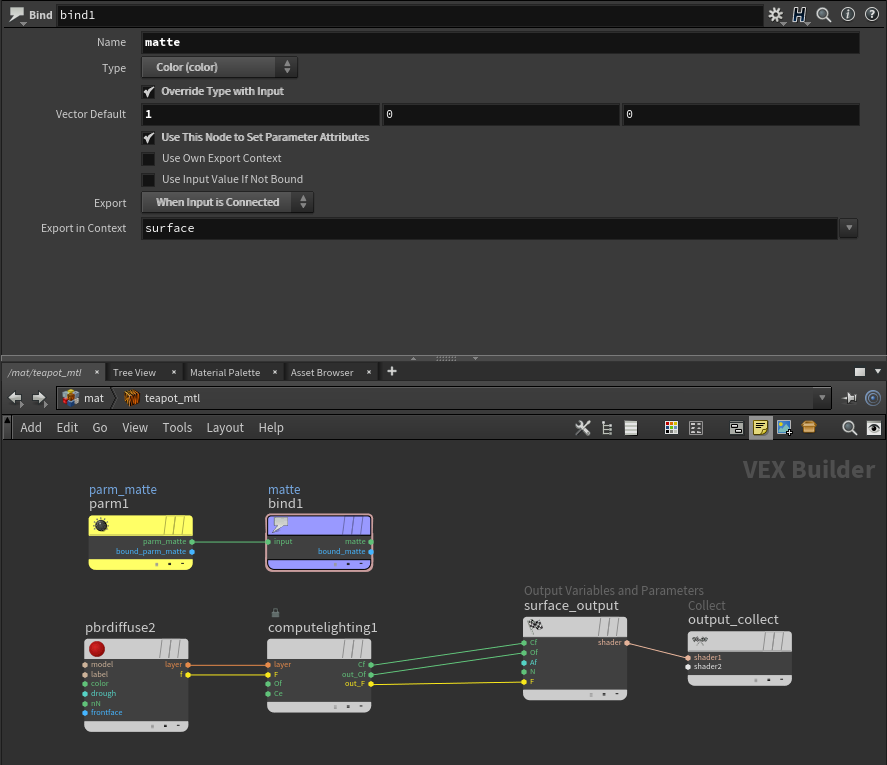
The material containing the matte attribute to be refracted.
The trickier part is convincing the refracting material to refract this element and return a useful result to the same AOV. To do this, we’ll use the VEX gather() function. The result will be bound to the same matte render element as before, but we’ll be pulling the results from other materials exporting the same attribute. Here’s how:
First, you’ll need to open up the Material Builder for the refractive shader, or otherwise make the network editable. Next, drop down a Snippet VOP. The VEX code is as follows:
vector hit = 0;
vector sum = 0;
gather(P, T, ”bias”, 0.01, ”samples”, samples, "angle", refr_rough, ”matte”, hit) {
    sum += hit;
}
out = sum / samples;
The gather() function is an interesting one in that it operates as a loop. We define a list of arguments, and then based on the number of samples we choose to take, the loop runs repeatedly and samples whatever attribute we choose. It’s up to us to decide what we actually want to do with this value… in many cases, you want to average out all of the samples you take. This can be accomplished by adding together all of your samples, then dividing them by the number of samples taken.
gather() needs a position and a direction, which we provide as P and T. P is simply world position from the shader globals, so that can be directly connected to the Snippet. T is the transmission vector, which can be computed via a Fresnel VOP. The Fresnel VOP will automatically get the normalized normal (N) and incident vector (I) from the shader globals, so the only input that needs to be manually provided is the index of refraction, labelled as eta on the node. A very important note about this value is that the index of refraction that the Fresnel VOP wants isn’t what you think it is… the number actually needs to be the “outside IOR” of the refractive material, divided by the “inside IOR”. Since the outside IOR of the material is almost always 1.0, this basically just means you need to plug 1/insideIOR into the eta of the Fresnel VOP, or insideIOR^-1.
The gather() function also can accept all manner of variadic arguments such as bias (for ray bias), samples (for the number of samples cast), or angle (in the case of a glossy refraction, the cone angle in radians in which random refraction samples are cast). You can also specify a particular attribute name, such as Cf, and follow it with a variable that you want to store the gathered value to. In our case we’re grabbing the matte attribute we’re exporting from our other shader, and storing it in our temporary container variable called hit.
Next, we need to provide a parameter to the Snippet to define the number of samples to take. This will be an integer parameter called samples, which is connected as one of the inputs. We’ll also grab the Refraction Roughness (refr_rough) parameter of our refractive material, promote it, and connect its output to the snippet. Finally, due to a quirk of the Snippet VOP, we need to create a constant vector value to act as the “container” of the samples, which will be the value we actually output. We’ll call this constant out, set it to zero, and connect it to the Snippet’s input. Finally, the output corresponding to this out input of the Snippet is connected to the Bind Export VOP that’s writing out the matte channel. Here’s a graph of the network:
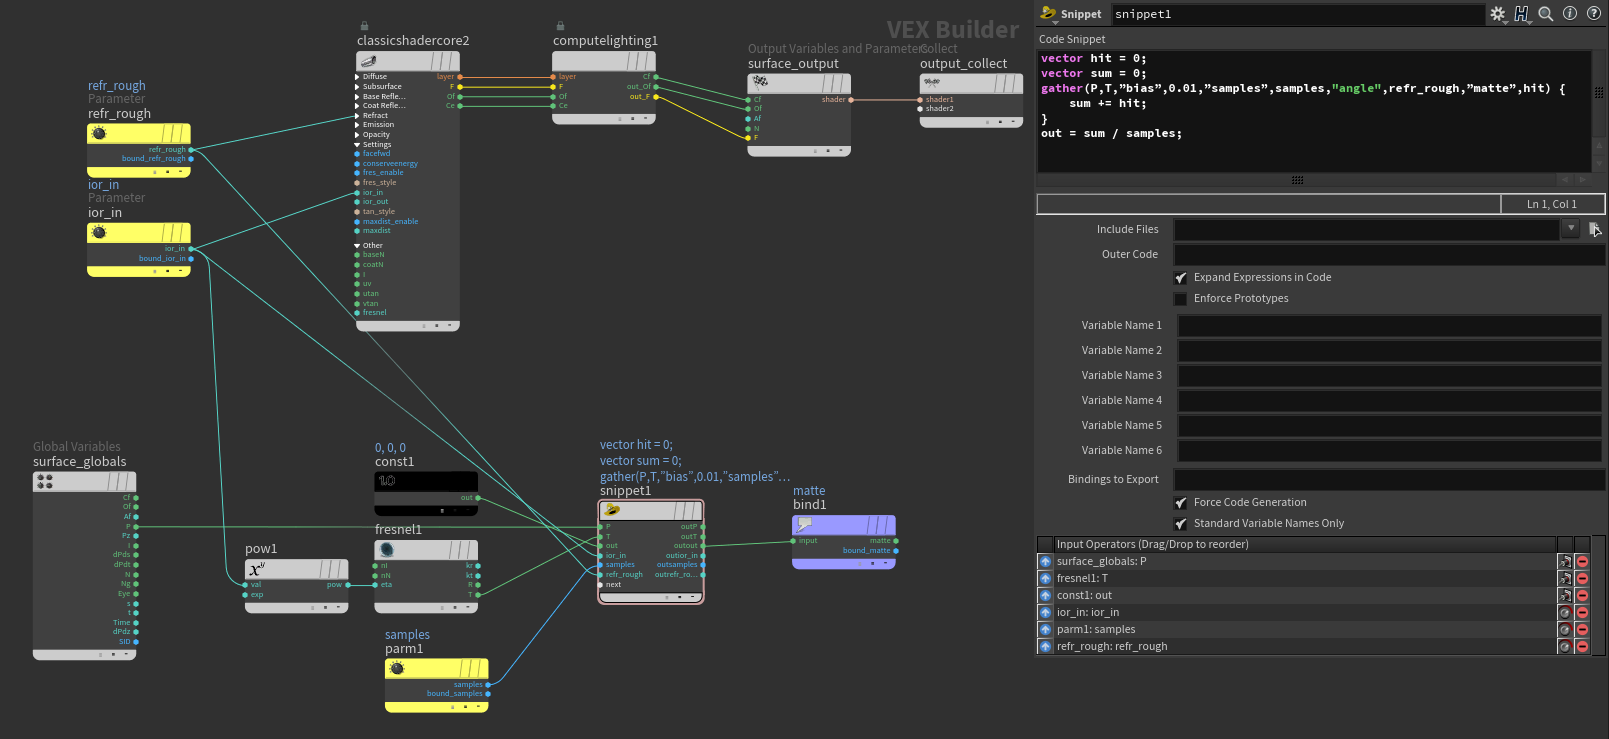
The shading network for the refractive material.
Now that everything’s connected, let’s go over the code. First we define a couple of “container” variables that will store each individual sample we take (since gather is inherently a loop), and the sum of all of those samples. Inside the gather() loop, we grab the value of matte and bind it to hit, then add hit to sum. Once the loop is finished, we divide sum by the number of samples we took to get an average value. This becomes the actual out value for the Snippet, which we connect to the Bind Export.
The last thing to do is to ensure that the matte export variable is being exported as an extra image plane in the Mantra ROP. Once this is set up and your materials are correctly assigned, rendering the scene should get you a matte channel that looks something like this:
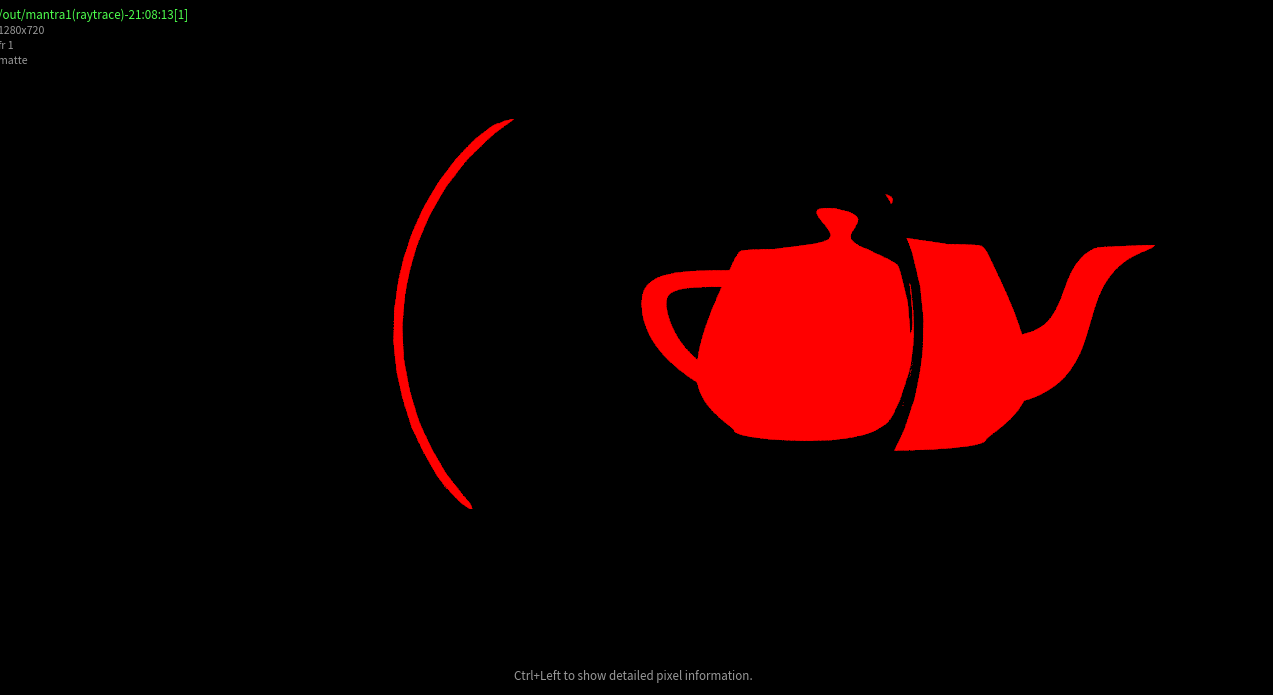
The matte channel, refracted.
Of course, a HIP is worth a thousand words, and I’m incoherent, so here’s the example file! If you adjust the refraction roughness of the glass material, be sure to increase the number of samples you take to get a cleaner result for the matte channel.
Enjoy!
2 Comments
clear · 05/12/2021 at 10:26
Excellent, almost exactly what I was looking for.
But, how would you do it for reflections?
Maksim · 07/29/2021 at 15:23
Thanks