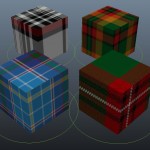
There are plenty of situations in motion graphics where you have tons of repeating elements. Designers love that kind of thing. You’ll also often be expected to make slight variations of these repeating elements… like a bunch of dots or squares or something that have slightly different textures to them, but are essentially the same thing. You could make a unique shader or a separate referenced asset for each one of these variations, if, say, you really hated yourself. Instead you could build the texture swap right into a rig, so the animator or designer or whoever could just pick a color or a texture for each object while animating the scene. This makes it way easier to direct, and you can just reference the same object over and over again instead of making multiple assets. I was just showing somebody how to do this the other day and figured it’d be a good thing to post about. Here’s how the setup works…

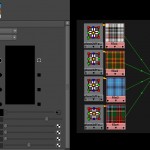
Initial setup for the texture switch. Remember to delete the place2DTexture node attached to the ramp.
Start by creating a shader and a ramp texture. The ramp will be used to store all the different swatches or textures you’re going to choose between. Then fill in the ramp with textures or colors. I am building a switch for four possible textures in this example. Space the textures evenly apart in the ramp, so if you have four textures like mine, set one color entry of the ramp to be at position 0.0, the next at 0.25, the next at 0.50, and the last at 0.75. Turn off interpolation. Then delete the place2DTexture node that was created with the ramp texture… you want the individual file textures to have placement nodes, but not the ramp!
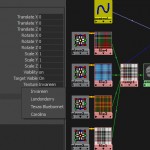
Now we need a controller channel to select an entry from the ramp. I’m going to put my controlling channel on a NURBS curve that the object is constrained to. Create a new attribute on the control object of type ‘integer’ or ‘enum.’ Enum attributes are just integers with nice names and a dropdown list… I like using them for texture controls because they’re more descriptive than just numbers. Add as many entries to the enum list at the bottom of the Create Attributes window as you need, then create it.

The final setup for the texture controller. I used an enum attribute because it's a little more descriptive for the texture names.
Because an enum or integer attribute starts at zero and goes upwards by whole numbers and a ramp’s coordinates always go from zero to one, we’ll have to do a little math to figure out exactly how the controller is going to tell the ramp which texture to use. If you’re using four textures like me, all you have to do is divide the attribute’s value by four, and then feed the resulting number into the ramp’s vCoord attribute. This way if I picked the last entry of the attribute (3, since we’re starting at index 0), 3/4 = 0.75, or the position of the last entry of the ramp. We’ll use a multiplyDivide node for this. Connect the controller’s new attribute to the input1X of a new multiplyDivide node. Set input2X to 0.25 to divide by 4. I typically don’t use the divide function because then you risk dividing by zero, which always returns an error in Maya. Now connect outputX of the multiplyDivide to the vCoord of the ramp. That’s it! Now you can control the color of your object like you’d control it’s translate or rotate properties.
Now you can take this rig and reference it multiple times into your scene, and each reference has an easy texture control. For referencing pipelines, this can be really useful. Hope this is helpful for someone.
